Good afternoon, ladies and gents!
We've all been there. It's that pivotal moment in time when you're standing in your closet, staring blankly at your clothes. There are so many options! Too many options. You can't very well go wandering around in your underwear, though, so... what do you wear??
The same can be said for nail polish. In fact, it may be even more of an issue with nail polish. Should I go with a glitter? A frost? A creme? Do I want to wear a green or an orange? Do I go with a plain mani, or do I do nail art? Maybe I'll do some stamping... but which plate do I use?
Many a time I've sat in front of my polish rack, doe-eyed and drooling. Minutes would tick by, and my poor naked nails would stare up at me accusingly as if to say, "Pick something already!" After wasting so much time, I decided that I needed a system.
The first system I incorporated included a list of nine manicures I could choose from: French tips, gradient, water marble, dotticure, stamping, decals, boo box, stripers or striping tape, and glitter or plain. This way I would use all the nail art supplies that I have.
(I'm not sure I've explained my "boo box" before, so I'll touch on that quickly. My boo box consists of polishes that are really old or are colors or finishes I don't really care for.)
I could do a water marble for one manicure, and then a gradient for the next. I wouldn't allow myself to do another water marble until I had gone through the entire list. However, I did let myself have a little flexibility by combining manicures--for example, I could do a French tip with stamping, but count it as a french tip so that I could stamp again. Or I could do decals with something out of my boo box so that I could do decals again.
It was a decent system, but I still ran into the problem of what colors and finishes to use. And since I had a tendency to gravitate towards certain polishes, other polishes that I liked weren't getting used. Thus, the second--and currently used--system was born.
I created a spreadsheet that listed every polish, base coat, and top coat that I own--even the boo box polishes. When it's time for a new mani, I'll pull up random.org and have it pick a number. I'll then go through my spreadsheet to find which polish coordinates with that number. I have to use that particular polish in my next mani. I can wear it on its own, or combine it with other polishes to do nail art. If random.org happens to pick a base or top coat, I have free reign in the nail design as long as I use that particular base or top coat.
Still, even this system isn't perfect. For example, the most recent polish picked is Nabi's "Abyss", which is a chunky blue glitter. I really don't want to wear this on all my nails, so I plan to do a couple of accent nails with it. The problem is that I can't decide what to do on my other nails! I've decided to go with KleanColor "Metallic Aqua", as it matches the glitter very well, but I can't figure out what nail art to do with it! I've even tried falling back on the old system... I'm just stuck.
I really can't complain, though. These systems have definitely cut down on the slack-jawed, brain-dead, staring-at-my-polishes-for-hours dilemma.
How do YOU decide what to wear?
Thursday, February 2, 2017
Saturday, January 28, 2017
Swapping Spaces
Hey folks!
So... I've started my own YouTube channel (it's Mani on a Budget over there, too, in case you're interested). Since I'll be covering the manis I do over there, I think to reduce redundancy I'm going to change things up a bit here on my blog.
What I'll be posting here will be my hauls, a few tips and tricks, recommendations and reviews of products, and a bit of general mayhem.
To start off that trend, I'd like to discuss the lovely polishes I picked up in Zoya's "try4free" promotion. In this promotion you could get four polishes for free if you paid the promotional shipping, which was $15. That puts each polish at only $3.75!
 Of course I went and lost the photo I had of all four... but if you follow me on Instagram (@jennravenwing) you've already seen them. This one here is the entire reason I hopped on the promo bandwagon. This is "Remy". I just heaved a dreamy sigh, because... well, because she's dreamy! "Peacock Blue" comes to mind first and foremost when trying to describe her. She's a deep blue base with teal and gold shimmer. "Remy" has the typical Zoya formula--excellent to work with. She did stain my nails quite a bit, but the color is so very worth it!
I also picked up "Oceane", because I'm a nut for the blues. Especially the cobalt/aqua blues. "Oceane" is a bright aqua blue with lots of blue shimmer. I haven't worn her yet, but I'm betting she may stain, too.
The third color I snagged was "Zuza", a gorgeous turquoise. She also has gold and silver shimmer running through her. I was really surprised at how opaque she was, being a bit of a lighter color. She's the only turquoise in my collection, and I'm excited to try her out.
Polish number four was... not a blue! Whoa.... It's "Cinnamon". Zoya's website describes "Cinnamon" as a "classic bronze liquid metal", but to me, it's much more brown than bronze. I'd say it really does look like its namesake, yet in a metallic form. Definitely something new to my collection!
I'm seriously considering water marbling with "Oceane", "Zuza", and "Cinnamon". Or maybe just "Oceane" and "Cinnamon".
At any rate, $3.75 for a polish that's normally $10 is a pretty damn good deal, and I'm glad I took advantage of the promotion. From what I understand, Zoya usually has an "Earth Day" promotion as well, where they offer 50% off their polishes. I, unfortunately, won't be able to take advantage of that one, but if you're interested be sure to follow them on Instagram @zoyanailpolish to stay in the loop!
Wednesday, January 18, 2017
Stamping with "Splash!"
Greetings folks!
Today I'll be doing a quick run-through of this stamped mani:

For my base coat I used Pure Ice "Bottom Line" ($1.97 @ Walmart).
I then applied Wet 'n' Wild "Black Creme" as my base color ($0.99 @ Walgreens).
The stamping plate I used was Bundle Monster's XL-02 ($3.20 per plate @ Walmart.com). I used the jumbo clear stamper that I got from Born Pretty Store for $2.99.
Then I broke out my Pure Ice "Splash!". Now, I honestly didn't think this would stamp, as it's a very sheer, very shimmery polish. But boy, was I wrong! It stamped like a dream. I would suggest using some kind of protective barrier, though--liquid latex, tape, etc. The shimmer did not want to let go of my skin!
As usual, I topped off the mani with Seche Vite ($2.08 @ head2toebeauty.com).
The overall look is very subtle, but when the light hits that gorgeous blue shimmer... I just heaved a dreamy sigh... it flares to life.
It just goes to show that it never hurts to try anything and everything. Even if you think it's not going to work, it may surprise you and end up becoming a stunning manicure!
Friday, January 6, 2017
Gifted Goodies
Good afternoon folks!
Today I'll be sharing with you some of the goodies I received over the holidays. But before I do that, I'd like to give some quick updates on some of the products I've already talked about.
First up, we have a couple of Wet 'n' Wild polishes: "Be More Pacific" and "Ready to Propose". Both of these are stainers. I wasn't terribly surprised about "Be More Pacific", as greens, blues, and dark reds do have a tendency to stain--especially in the lower budget brands. But I was rather shocked that the gold stained. It turned my fingernails brown! Honestly, though, staining isn't a major issue to me; my nails are always painted anyway.
As for the Born Pretty Store stuff, the stamper works beautifully. I love it. But the stamping polishes are garbage. They not only stink to high hell, the white doesn't even work at all! The black is okay, but not very pigmented. The nail studs that I purchased are okay, but the special shapes (hearts, stars, etc.) are too big to lay flat on my nails. However, I have very narrow nails with a very strong c-curve, so this might not be an issue for most people.
I've also figured out how to get the Nicole Diary stamping plates to work (mostly). I was so used to working with the BMC XL plates that I was scraping and pressing my stamper too hard on the smaller, less deep images of the ND plates. It's still going to take some practice, but I think I can get all the images to pick up now.
Remember when I said that Jess warned about China Glaze "Combat Blue-ts" drying super fast? She wasn't kidding. You can get away with three strokes... maybe four if you're quick, but that's all the wiggle room you have. If you try to manipulate it too much, you'll end up picking up the polish you already laid down. Still, it's a stunning color, and the matte look is awesome, so I feel that it's well worth it.
Alright, let's get into the new stuff, shall we?
So, I know I said I was on a "no buy" for a while, but there were a couple opportunities I just couldn't pass up.
The first was Zoya's Black Friday sale. Uhmmmm HELLO! Zoya for $3 a bottle?! How could I not take advantage of that?
 Prior to this sale, I didn't own--nor had I even tried--any Zoya polishes. So when the chance arose to snag some for so cheap, I was all over it. I wanted to see what the hype was about! I didn't go too crazy, though. Originally I had 9 polishes in my cart, but I reigned myself in and only ended up buying four. These beauties are "Ember", "Tangy", "Elisa", and "Katherine".
"Ember" is so amazingly luscious. When I first received it, I was worried. I thought, Oh hell, this looks a lot more orange than it did on my monitor. But then I swatched it. I am so in love! I know this sounds crazy, but if I ever run out of her, I might actually pay the full $10 for another bottle. She's a bright orangy-red with an amazing luster--damn near chrome-like. "Tangy" is a funky, fun green shade unlike anything I had in my collection. "Elisa" is a gorgeous crimson red. I'm not normally a fan of reds, but this Zoya is amazing. "Katherine" is a deep purple jelly. I wanted a jelly because I'd like to try pond manicures and jelly sandwiches. I've never worked with jellies before, so I was a little surprised at how streaky it is. However, I'm still excited to work with it. All of these polishes just glide on like butter. The hype for Zoya is well deserved!
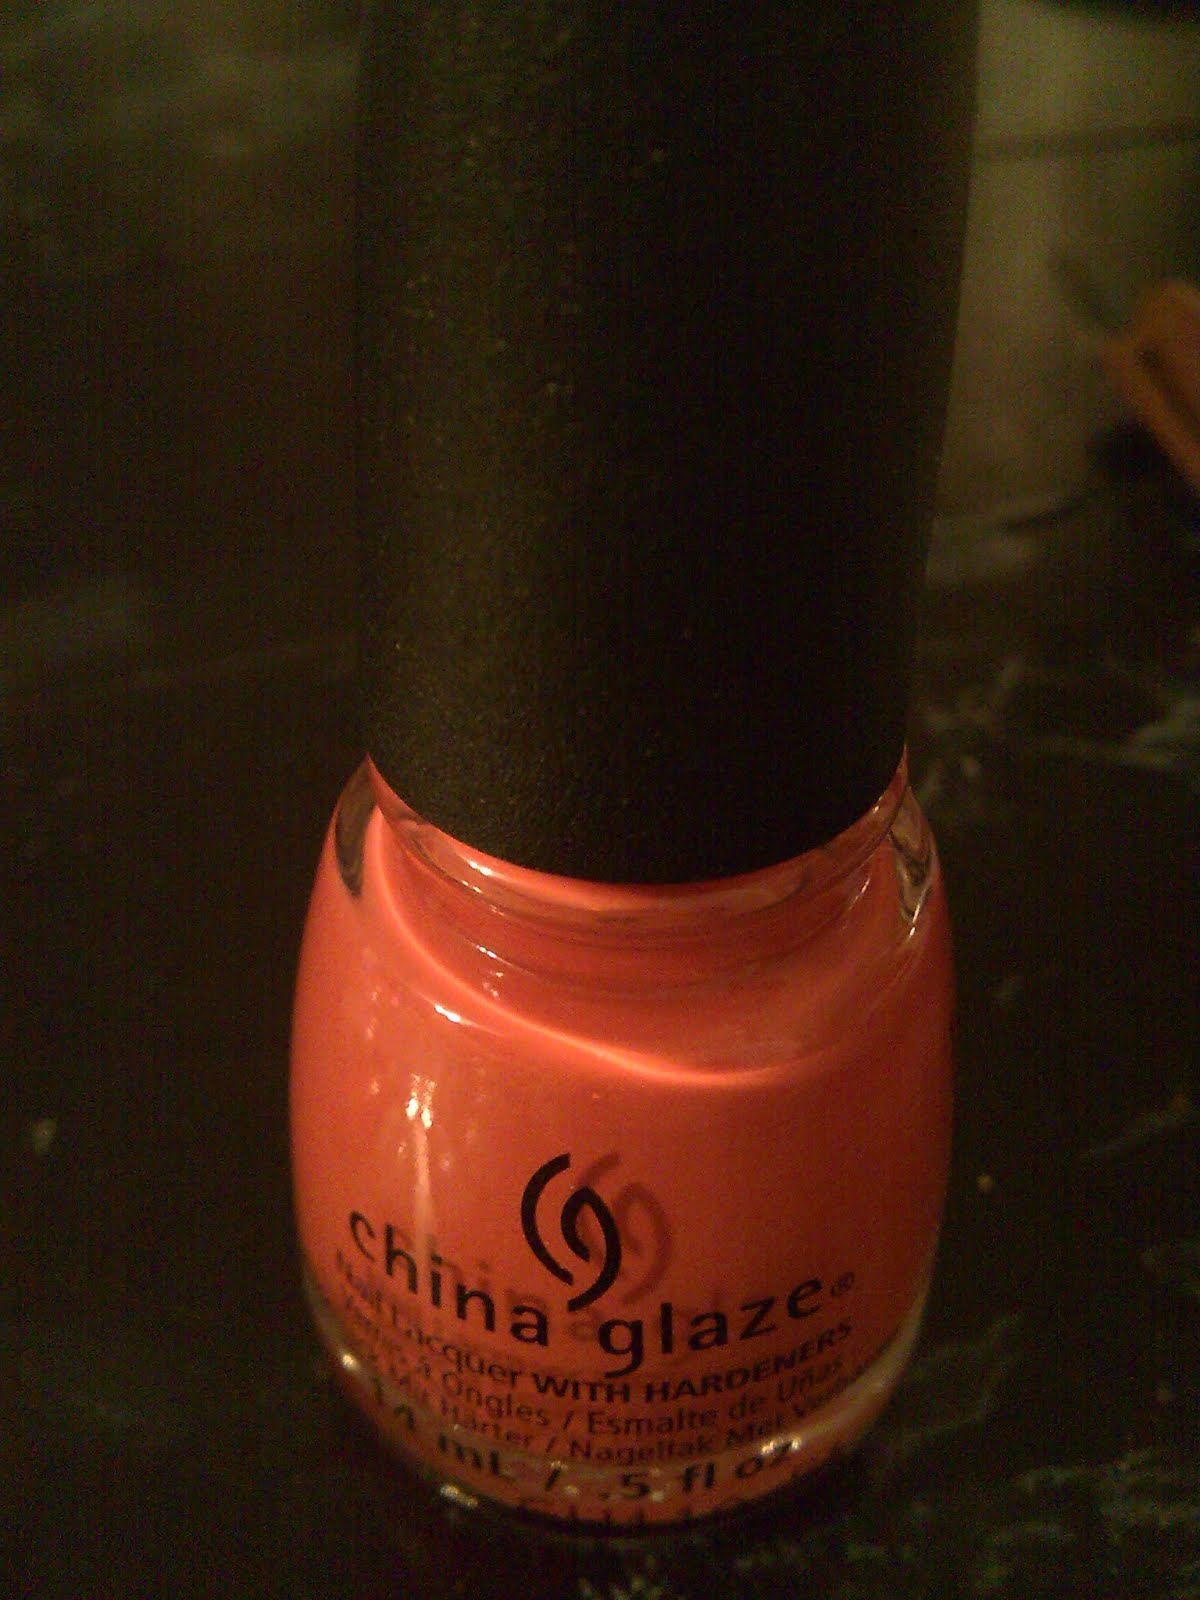
 Another deal I wanted to take advantage of was the $5 off coupon from Sally Beauty Supply. I was given this coupon when I went in to grab some acetone and nail wheels. You could get $5 off any purchase of $5 or more. So I figured I would grab China Glaze "Tis the Sea-Sun" from their recent Seas and Greetings holiday collection. Surprisingly, I didn't have any corals in my collection, so this was a great addition. Between the coupon and my Beauty Club Card, I paid $1.49 for the polish.
Now on to the presents! My dad did a great job picking out some polish for me--so good, in fact, I can't help but wonder if he had help from his wife... hee! He sent me the 12-piece Kleancolor metallics collection. Now, in reviews I've seen online, the original collection that was released two years ago had a "Metallic Black". Whether it was a packing error or whether they've replaced that original black I'm not sure, but in its place I received "Golden Nightmare" which is a black with gold micro-glitter. The other colors in this collection are white, orange, red, pink, mango, yellow, green, sapphire, purple, fuschia, and aqua.

These colors are soooooo gorgeous. I'm in love with the entire collection. A lot of these are one-coaters. The white does take two, but... it's white. That's to be expected. They're amazing on their own, but folks... if you slap a glossy top coat on 'em... they come alive! I've heard that Kleancolor polishes work great for stamping, too. I can tell you, though, that the white and the "Golden Nightmare" do not work. I think they have too much shimmer/micro-glitter. The price point is great, too. You can get this whole set on Amazon for $11.99, which puts each polish at only a dollar!
 Unfortunately, there are some downsides. These polishes do stink a bit. And... they bleed. I'm not sure what it is, but once you put a top coat on these bad boys they will melt right before your eyes. If you're doing a plain mani, this is a boon. But if you're trying to do nail art, it's definitely a bane, as can be seen in this photo of a recent mani. I thought perhaps I hadn't let it dry long enough, but that proved not to be the case. I let the other nails dry overnight, and the next morning made sure to float my top coat. Yet I got the same result. I sat there and watched in horror as it bled more and more as the top coat dried.
Still, for the price and the color payoff, I think these polishes are great.
I asked my mom for Sinful Colors "Snow Me White" for Christmas, but as per usual, she took it 18 steps further and got me all these goodies!

The first item was a package of plate sleeves from Bundle Monster that hold various shapes and sizes, along with a pouch that can hold my stampers, scrapers, and other stamping supplies. These are sturdy sleeves with metal ringlets--they'll hold up for a while! The only downside is that they're not completely clear, so it's a wee bit hard to see the images through the plastic.
She also got me a 25-piece round plate set from Bundle Monster (plates 301-325) and a 25-piece round plate set from Pueen (plates 01-25). It's taken me a bit of practice to get used to these plates, as I had the same heavy-handed issue that I did with the Nicole Diarys. But both sets have some awesome images. I'm excited to use them!
Instead of the Sinful Colors polish I asked for, Mom got me the Bundle Monster duo of "BAM! White" and "Straight Up Black" stamping polishes. Both work great. "BAM! White" is very opaque! I highly recommend!
She also got Bundle Monster's "Poli-Peel", which is a liquid latex barrier. I haven't tried this yet, but I'm betting it's a lot better than the crap I got from China. Especially since said crap is now completely dried out and unusable. Pbbt.
That's all I have for you today! Now that the holidays are over hopefully I can catch up on some of the manis I've done.
Have a fantabulous day!
Today I'll be sharing with you some of the goodies I received over the holidays. But before I do that, I'd like to give some quick updates on some of the products I've already talked about.
First up, we have a couple of Wet 'n' Wild polishes: "Be More Pacific" and "Ready to Propose". Both of these are stainers. I wasn't terribly surprised about "Be More Pacific", as greens, blues, and dark reds do have a tendency to stain--especially in the lower budget brands. But I was rather shocked that the gold stained. It turned my fingernails brown! Honestly, though, staining isn't a major issue to me; my nails are always painted anyway.
As for the Born Pretty Store stuff, the stamper works beautifully. I love it. But the stamping polishes are garbage. They not only stink to high hell, the white doesn't even work at all! The black is okay, but not very pigmented. The nail studs that I purchased are okay, but the special shapes (hearts, stars, etc.) are too big to lay flat on my nails. However, I have very narrow nails with a very strong c-curve, so this might not be an issue for most people.
I've also figured out how to get the Nicole Diary stamping plates to work (mostly). I was so used to working with the BMC XL plates that I was scraping and pressing my stamper too hard on the smaller, less deep images of the ND plates. It's still going to take some practice, but I think I can get all the images to pick up now.
Remember when I said that Jess warned about China Glaze "Combat Blue-ts" drying super fast? She wasn't kidding. You can get away with three strokes... maybe four if you're quick, but that's all the wiggle room you have. If you try to manipulate it too much, you'll end up picking up the polish you already laid down. Still, it's a stunning color, and the matte look is awesome, so I feel that it's well worth it.
Alright, let's get into the new stuff, shall we?
So, I know I said I was on a "no buy" for a while, but there were a couple opportunities I just couldn't pass up.
The first was Zoya's Black Friday sale. Uhmmmm HELLO! Zoya for $3 a bottle?! How could I not take advantage of that?

"Ember" is so amazingly luscious. When I first received it, I was worried. I thought, Oh hell, this looks a lot more orange than it did on my monitor. But then I swatched it. I am so in love! I know this sounds crazy, but if I ever run out of her, I might actually pay the full $10 for another bottle. She's a bright orangy-red with an amazing luster--damn near chrome-like. "Tangy" is a funky, fun green shade unlike anything I had in my collection. "Elisa" is a gorgeous crimson red. I'm not normally a fan of reds, but this Zoya is amazing. "Katherine" is a deep purple jelly. I wanted a jelly because I'd like to try pond manicures and jelly sandwiches. I've never worked with jellies before, so I was a little surprised at how streaky it is. However, I'm still excited to work with it. All of these polishes just glide on like butter. The hype for Zoya is well deserved!
 Another deal I wanted to take advantage of was the $5 off coupon from Sally Beauty Supply. I was given this coupon when I went in to grab some acetone and nail wheels. You could get $5 off any purchase of $5 or more. So I figured I would grab China Glaze "Tis the Sea-Sun" from their recent Seas and Greetings holiday collection. Surprisingly, I didn't have any corals in my collection, so this was a great addition. Between the coupon and my Beauty Club Card, I paid $1.49 for the polish.
 Now on to the presents! My dad did a great job picking out some polish for me--so good, in fact, I can't help but wonder if he had help from his wife... hee! He sent me the 12-piece Kleancolor metallics collection. Now, in reviews I've seen online, the original collection that was released two years ago had a "Metallic Black". Whether it was a packing error or whether they've replaced that original black I'm not sure, but in its place I received "Golden Nightmare" which is a black with gold micro-glitter. The other colors in this collection are white, orange, red, pink, mango, yellow, green, sapphire, purple, fuschia, and aqua.

These colors are soooooo gorgeous. I'm in love with the entire collection. A lot of these are one-coaters. The white does take two, but... it's white. That's to be expected. They're amazing on their own, but folks... if you slap a glossy top coat on 'em... they come alive! I've heard that Kleancolor polishes work great for stamping, too. I can tell you, though, that the white and the "Golden Nightmare" do not work. I think they have too much shimmer/micro-glitter. The price point is great, too. You can get this whole set on Amazon for $11.99, which puts each polish at only a dollar!

Still, for the price and the color payoff, I think these polishes are great.
I asked my mom for Sinful Colors "Snow Me White" for Christmas, but as per usual, she took it 18 steps further and got me all these goodies!

The first item was a package of plate sleeves from Bundle Monster that hold various shapes and sizes, along with a pouch that can hold my stampers, scrapers, and other stamping supplies. These are sturdy sleeves with metal ringlets--they'll hold up for a while! The only downside is that they're not completely clear, so it's a wee bit hard to see the images through the plastic.
She also got me a 25-piece round plate set from Bundle Monster (plates 301-325) and a 25-piece round plate set from Pueen (plates 01-25). It's taken me a bit of practice to get used to these plates, as I had the same heavy-handed issue that I did with the Nicole Diarys. But both sets have some awesome images. I'm excited to use them!
Instead of the Sinful Colors polish I asked for, Mom got me the Bundle Monster duo of "BAM! White" and "Straight Up Black" stamping polishes. Both work great. "BAM! White" is very opaque! I highly recommend!
She also got Bundle Monster's "Poli-Peel", which is a liquid latex barrier. I haven't tried this yet, but I'm betting it's a lot better than the crap I got from China. Especially since said crap is now completely dried out and unusable. Pbbt.
That's all I have for you today! Now that the holidays are over hopefully I can catch up on some of the manis I've done.
Have a fantabulous day!
Saturday, December 17, 2016
Woeful Watermarbling
Greetings folks!
Today we'll be talking about this here watermarble mani:

Actually, I'm going to interrupt myself for a minute to make a plea. Can someone please come hold my hand while I attempt cleanup??? I've watched I-don't-know-how-many videos on cleaning up your cuticles, but I just can't seem to do it right. I either don't get enough off, or I get too much off and have this huge gap that makes it look like my nails have grown out for two weeks. BLARGH! Admittedly, it has gotten a little easier since I switched from my angled paintbrush to the e.l.f. concealer brush all the nail gurus talk about. But I still need quite a bit of practice. If anyone has any tips or tricks, please feel free to let me know!
Now, you might be wondering, "Why is this watermarble so woeful?"
The watermarble itself isn't bad. I do like how the pattern turned out, and the colors (Color Club "Grand Dame" and Nabi "Metallic Champagne") work well together. But allow me to accentuate the issue here:

Yeah... now I remember why I don't buy light pinks. They do my skin tone no favors whatsoever.
One of the things I like about watermarbles, though, is that they last forever. This one could have lasted me a couple of weeks... if I hadn't gotten tired of it after only a few days. I think I'll stick to my hot pinks and fuchsias.
Today we'll be talking about this here watermarble mani:

Actually, I'm going to interrupt myself for a minute to make a plea. Can someone please come hold my hand while I attempt cleanup??? I've watched I-don't-know-how-many videos on cleaning up your cuticles, but I just can't seem to do it right. I either don't get enough off, or I get too much off and have this huge gap that makes it look like my nails have grown out for two weeks. BLARGH! Admittedly, it has gotten a little easier since I switched from my angled paintbrush to the e.l.f. concealer brush all the nail gurus talk about. But I still need quite a bit of practice. If anyone has any tips or tricks, please feel free to let me know!
Now, you might be wondering, "Why is this watermarble so woeful?"
The watermarble itself isn't bad. I do like how the pattern turned out, and the colors (Color Club "Grand Dame" and Nabi "Metallic Champagne") work well together. But allow me to accentuate the issue here:

Yeah... now I remember why I don't buy light pinks. They do my skin tone no favors whatsoever.
Wednesday, November 30, 2016
Foolish Raindrop FAIL!!
Greetings folks!
Today we'll be talking about how horribly I botched this mani:

Yep, that's one hell of an epic nail fail, there. I was trying to be awesome like Cristine, but obviously it didn't work.
I started off with "Bridge the Ridge" base coat ($5.49). I then applied one coat of Sinful Colors "Kryptonite" ($1.99).
...Then I heard my son stirring in the next room. Awwwww crap. Figures he'd decide to take a power nap instead of a two-hour nap. I hurried and slapped another coat of "Kryptonite" on my nails and topped it with Seche Vite ($2.08) so I could resume the mommy role.
I ended up wearing that alone for a day, and I really enjoyed it. But of course, it wasn't the final look I was going for, so the next day I used a makeup sponge to add Sinful Colors "Kalypso" ($1.99) to the base of my nails to create a gradient. I did use some liquid latex around the nails to help with clean up. Here's the thing, though: the liquid latex I have is something I bought for two bucks from China. It's crap. I wouldn't recommend it. I would warn you what not to buy, but I have no idea what the name of it is; it has no markings on the bottle whatsoever. I should have taken advantage of BundleMonster's cyber monday deals and snagged some Poli-Peel... but... I'm on a no-buy. Sigh.
Next came a coat of Wet 'n' Wild matte top coat ($0.99). And there, my friends, is where I should have stopped. This looked great! But no... No, I had to go and ruin the whole damn thing.
Maybe if I had used a thinner top coat, or even just a regular clear polish, it wouldn't have turned out so awful. But I'm an idiot and decided to use Seche Vite for my raindrops for maximum shine. Unfortunately it ended up being more akin to maximum blobbage.
Oh well, I suppose I can't vomit out awesomeness all the time.
Today we'll be talking about how horribly I botched this mani:

Yep, that's one hell of an epic nail fail, there. I was trying to be awesome like Cristine, but obviously it didn't work.
I started off with "Bridge the Ridge" base coat ($5.49). I then applied one coat of Sinful Colors "Kryptonite" ($1.99).
...Then I heard my son stirring in the next room. Awwwww crap. Figures he'd decide to take a power nap instead of a two-hour nap. I hurried and slapped another coat of "Kryptonite" on my nails and topped it with Seche Vite ($2.08) so I could resume the mommy role.
 |
| Without matte top coat |
 |
| With matte top coat |
Maybe if I had used a thinner top coat, or even just a regular clear polish, it wouldn't have turned out so awful. But I'm an idiot and decided to use Seche Vite for my raindrops for maximum shine. Unfortunately it ended up being more akin to maximum blobbage.
Oh well, I suppose I can't vomit out awesomeness all the time.
Thursday, November 17, 2016
Delectable Diamonds
Good afternoon all you shining happy people holding hands!
(Please forgive me... I'm on some pretty strong muscle relaxers, so I'll be even more odd than usual.)
Today I'll be discussing this here diamond manicure:

I started off with my Bridge the Ridge base coat. I then applied two coats of Color Club "Winter White".
Using BundleMonster's XL-10 plate and their "Electromagnetic" gold stamping polish, I stamped on the diamonds. I used my new BundleMonster double sided clear stamper, and it worked like a charm. I can't wait to try some double stamping with this puppy!
I topped the mani off with Seche Vite, as per usual.
Next up? I have no idea. Probably either a gradient or a water marble...
Want sneak peeks of the manicures featured here, as well as some bonus manis? Feel free to follow me on Instagram @jennravenwing. Fair warning: there will be a smattering of adorable baby pics as well!
(Please forgive me... I'm on some pretty strong muscle relaxers, so I'll be even more odd than usual.)
Today I'll be discussing this here diamond manicure:

I started off with my Bridge the Ridge base coat. I then applied two coats of Color Club "Winter White".
Using BundleMonster's XL-10 plate and their "Electromagnetic" gold stamping polish, I stamped on the diamonds. I used my new BundleMonster double sided clear stamper, and it worked like a charm. I can't wait to try some double stamping with this puppy!
I topped the mani off with Seche Vite, as per usual.
Want sneak peeks of the manicures featured here, as well as some bonus manis? Feel free to follow me on Instagram @jennravenwing. Fair warning: there will be a smattering of adorable baby pics as well!
Subscribe to:
Posts (Atom)